It is really quite easy to learn to crochet — all it takes is a little practice! As with anything, the best place to start is at the very beginning. In this post, we will cover the basic supplies needed to get started crocheting as well as how to get everything set up and ready so you can make your first stitch! Learning a new skill is an exciting new venture and I’m so glad you are interested in crochet. Check back on these instructions any time you need a refresher. It can take time to make everything second nature but I know you can do it. I did!
Materials
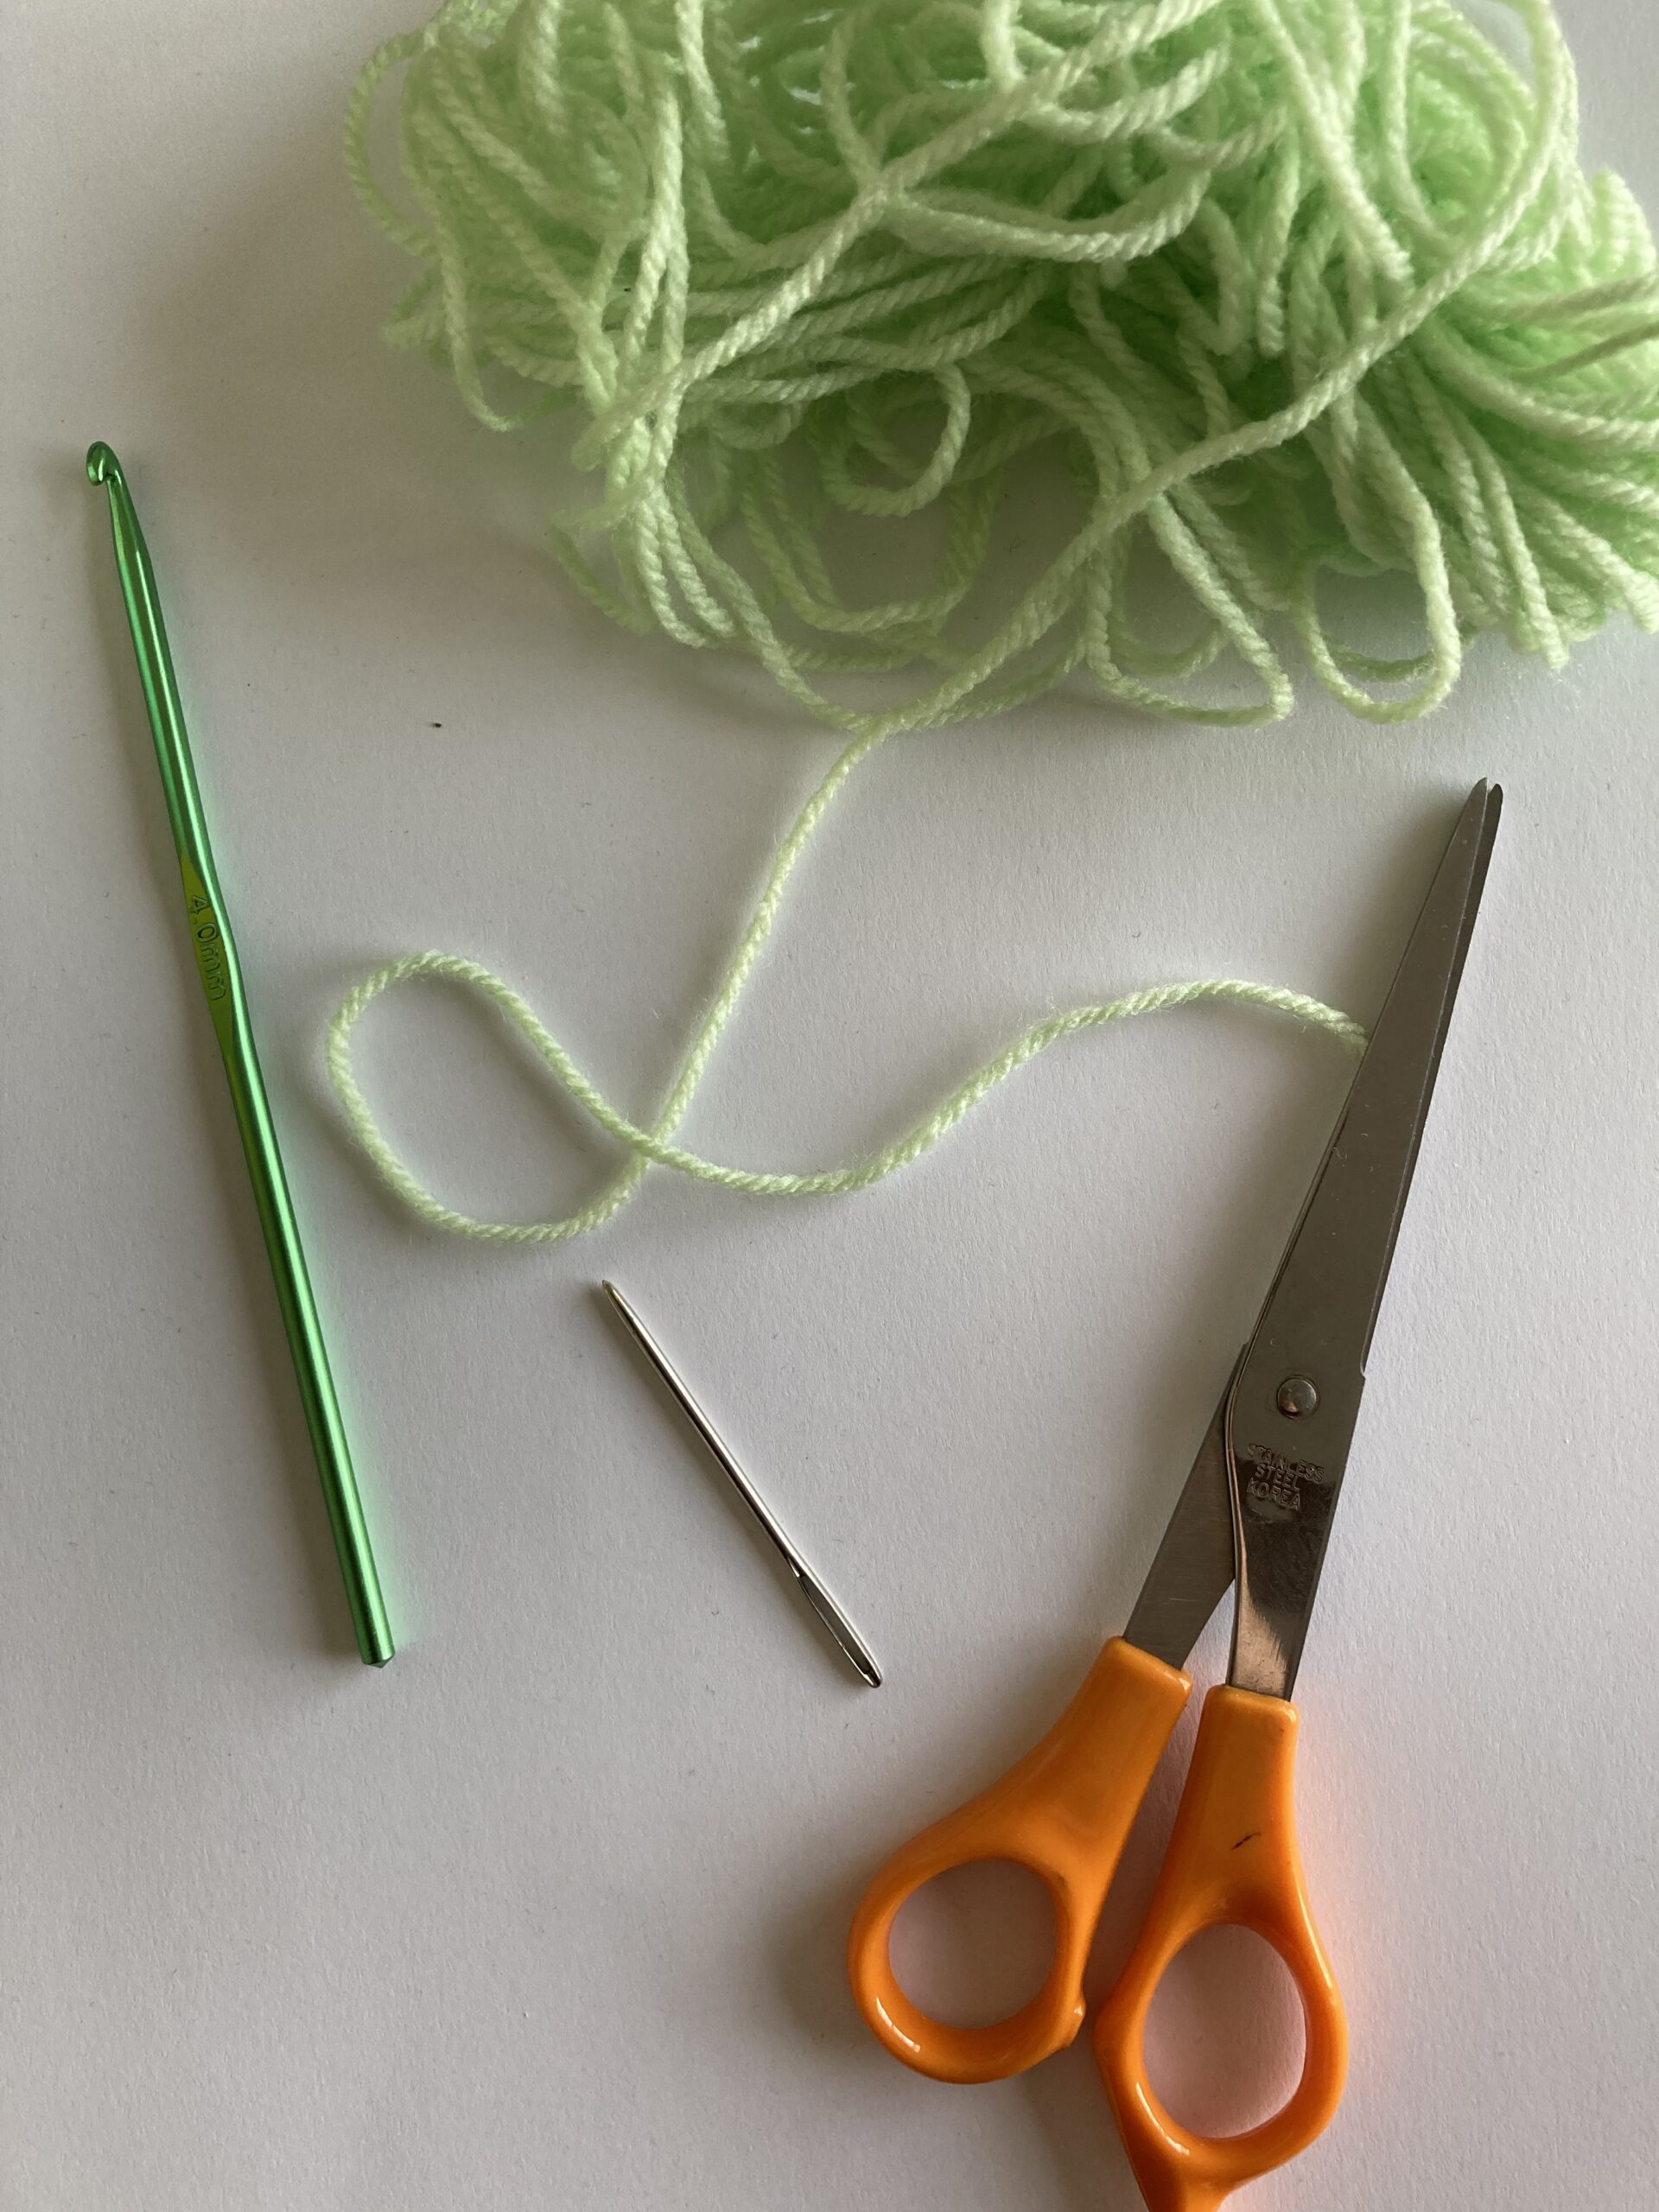
Only a few supplies are needed to get started crocheting. It’s definitely okay to start with basic/cheap supplies and only “splurge” on nicer hooks or yarns once you get the hang of things. The three main supplies needed are yarn, crochet hooks, and a yarn needle. Scissors are also important but don’t need to be anything fancy – any pair you have at home will do the job! Some projects might use other supplies like buttons, beads, or stuffing materials but that will vary from project to project.
This post contains affiliate links, which means I earn a small commission at no extra cost to you. See my full disclosure here.
Yarn
Yarn comes in many colors, textures, and sizes. It is made with a variety of materials, such as natural fibers like cotton or wool or artificial acrylic fibers. Yarns are classified according to their “weight.” This gives an indication of the thickness of the strand of yarn. These weights can be a number ranging from 0-7 or a category such as “worsted weight” or “fingering.” It is important to use the correct weight of yarn suggested in the pattern instructions in order to achieve the desired result.
The cost of yarn varies due to the type of materials used and the size of each skein. As far as colors and patterns go, the options are nearly endless. That choice is completely up to you! Here are some ideas to help you get started crocheting.
Crochet Hooks
Crochet hooks are the tools that make crochet what it is. Hooks are about the size of a pencil and have a hook at one end (surprise!). Crochet hooks come in a wide range of sizes in order to accommodate the large variety of yarn and project types. They are often aluminum, wood, or plastic. Choosing the hook material is mainly a personal preference.
Crochet hooks have sizes based on their diameter and are marked with the numerical size such as 5 mm. They may also have the size marked with a capital letter such as H. The letter used can vary depending on the country of origin, so millimeter measurements are the most accurate way to determine hook size. Hooks commonly come in 0.5 mm increments. I have found that the most common sizes used will likely be between 3.0 mm and 6.0 mm. This range of sizes will accommodate most sport, worsted, and bulky yarn types and is adequate for beginners. Check out this budget friendly set I love!
Yarn Needles
A yarn needle is a special type of needle with a blunt tip, a large eye, and a much larger diameter compared to sewing or embroidery needles. While yarn needles are not sharp, they still have a slightly pokey tip to be mindful of. This set has multiple sizes and comes with a convenient storage case.
Get Started Crocheting!
Slipknot
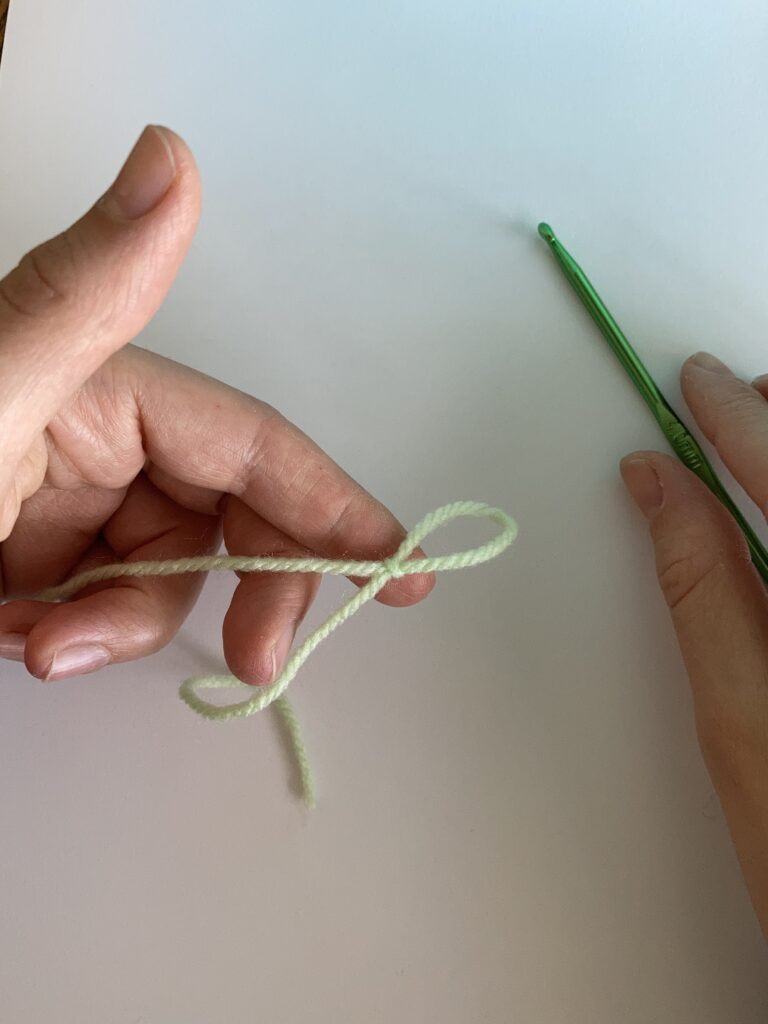
We almost always begin projects with a slipknot. This allows us to attach the yarn to the hook. Slipknots are adjustable which makes them perfect for crochet. In fact, we do not ever want to make any solid knots in our crochet projects.
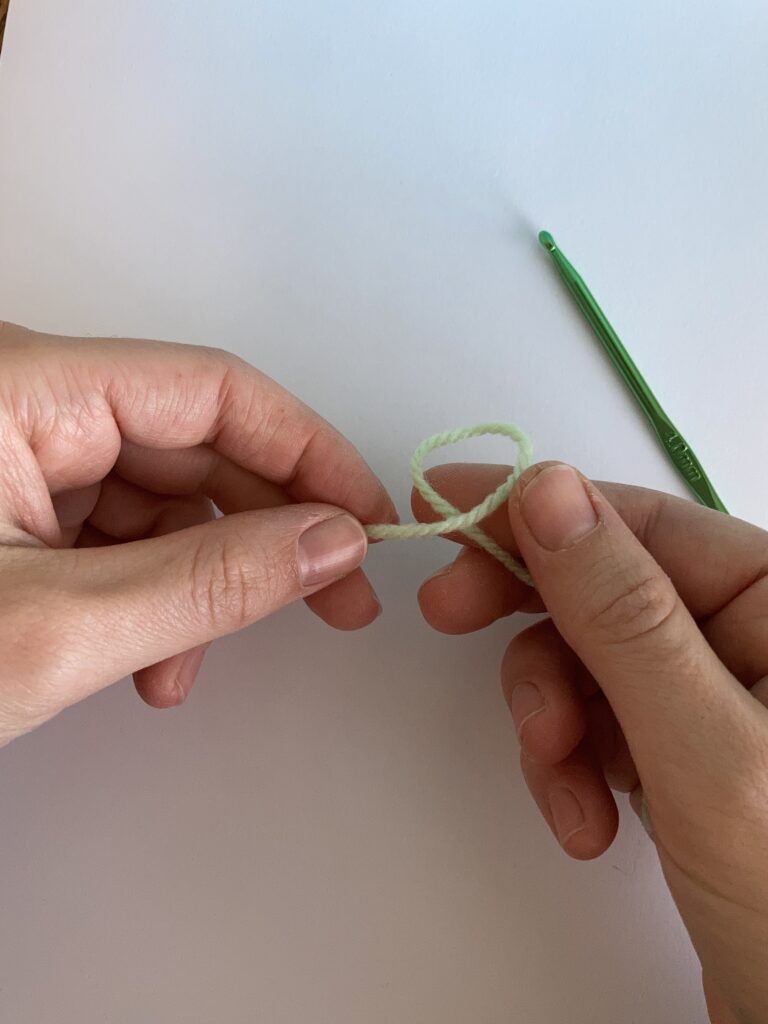
To make a slip knot, first pull a 6-10 inch tail out from your ball of yarn. Make a loop as shown. The yarn passing behind should be the loose end of yarn.
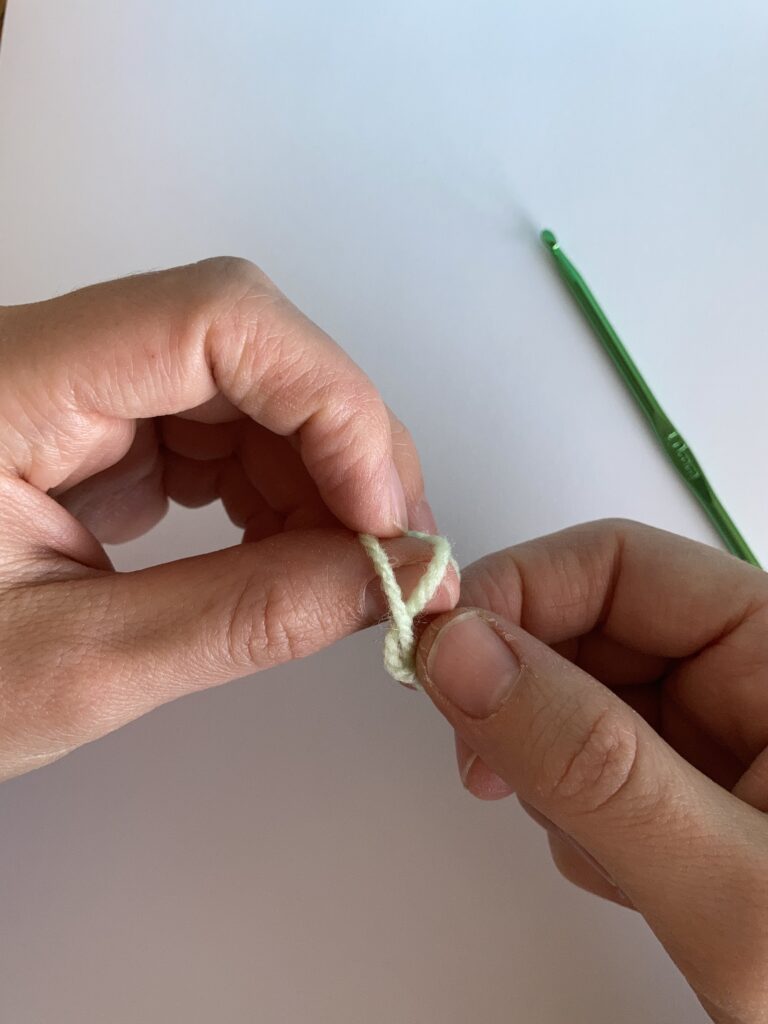
Take the portion of yarn that is connected to the ball of yarn and push a loop through the loop you have already made.
Hold this loop and pull the loose tail of yarn to tighten the knot.
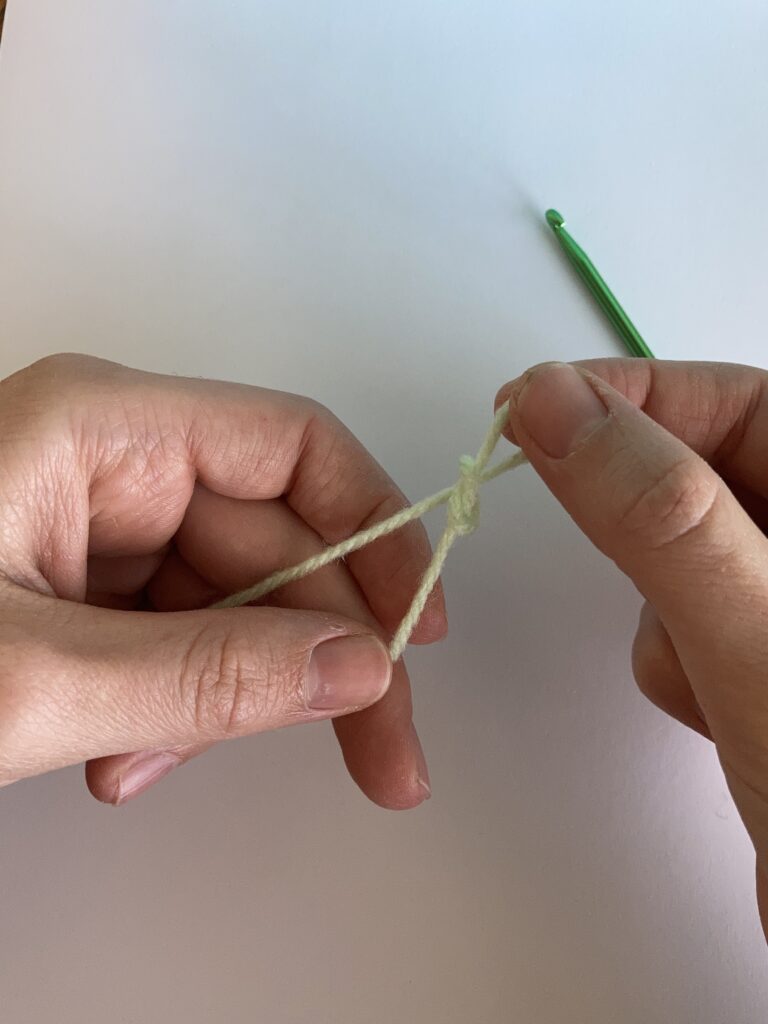
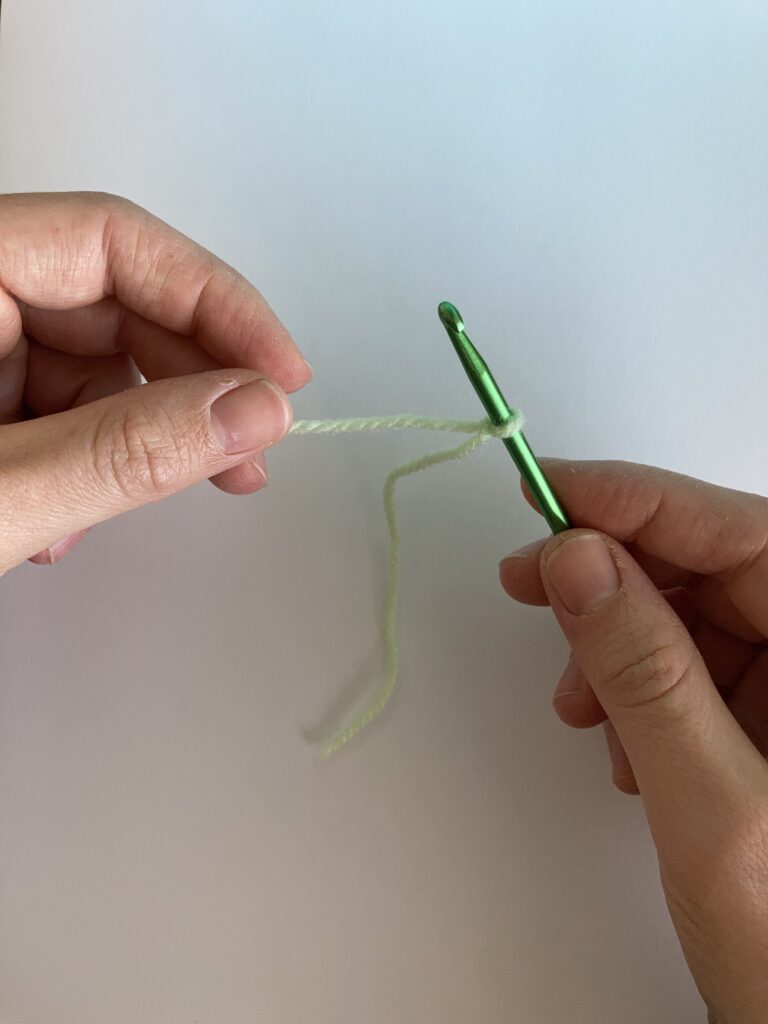
Now you have formed a slipknot! Notice that you can stretch the loop to make it larger or pull on the yarn tail to make the loop smaller.
Insert your hook into the loop and gently pull the loose tail until the loop tightens around the hook. It should be fairly snug but still able to easily slide along the crochet hook.
Holding the Yarn
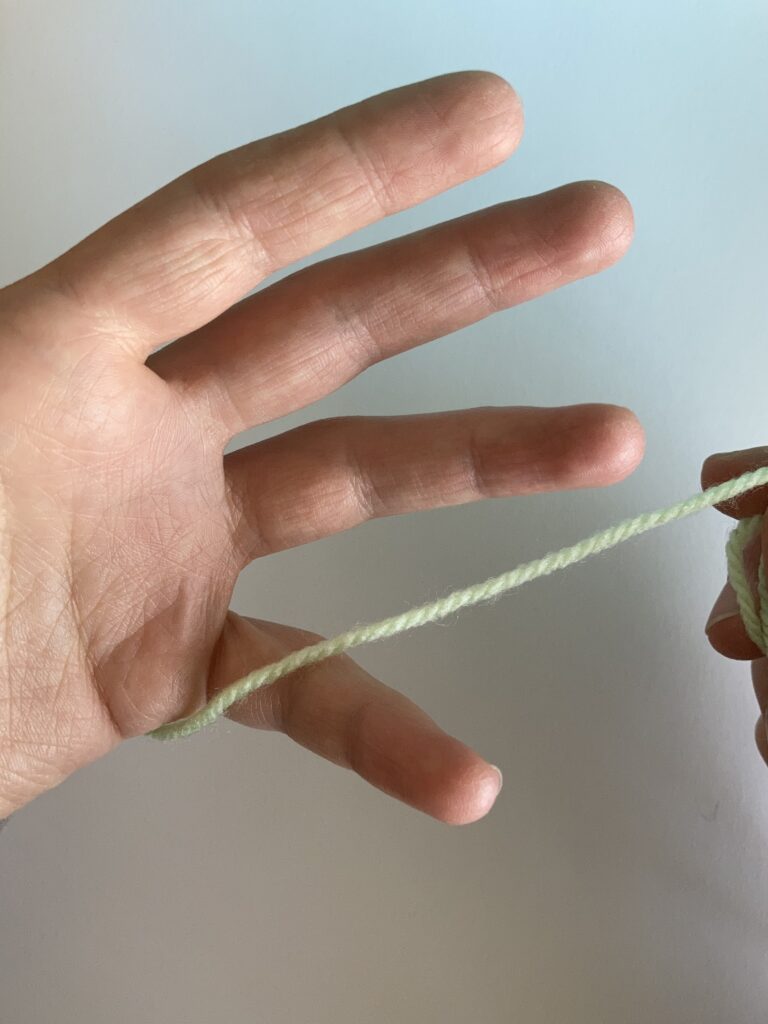
Crochet is a two-handed project, and the way that the yarn is held is actually very important. These instructions are written for the right-handed crocheter, where the right hand holds the hook and the left hand holds the yarn. If you are left-handed, reverse these instructions by swapping “right” and “left.”
With the palm of your left hand facing you, wrap the yarn around your little finger. The part hanging down below your little finger should be connected to the ball of yarn.
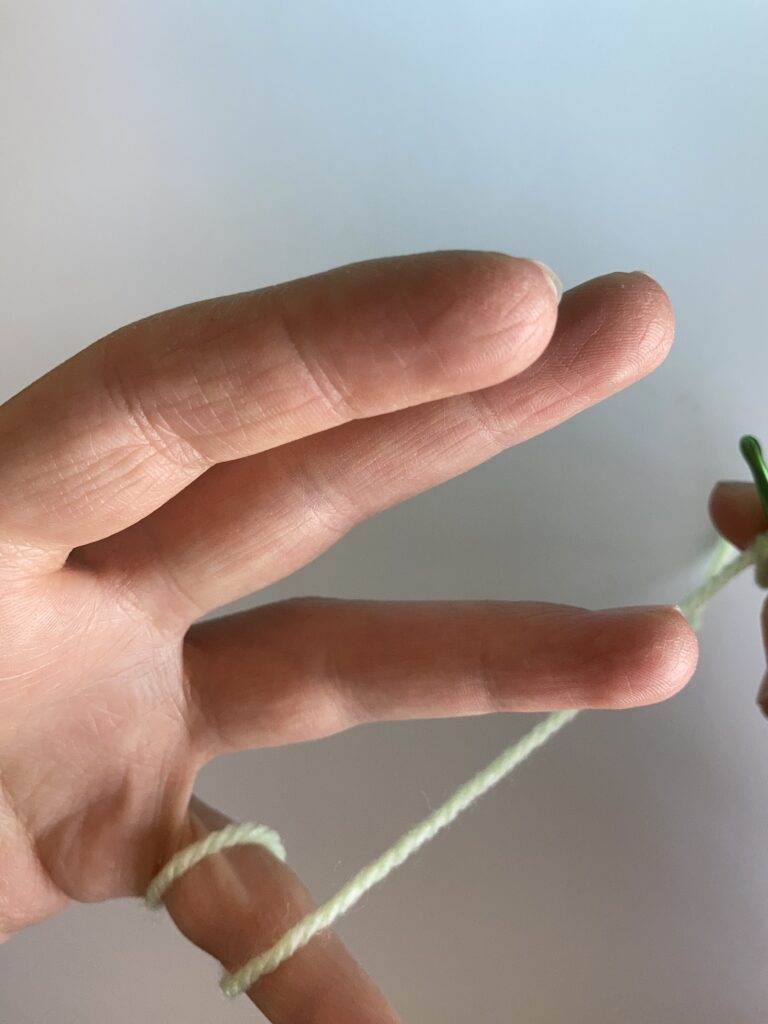
Next, bring the yarn up and over your index finger. The yarn should lay over the backs of your ring, middle, and pointer fingers.
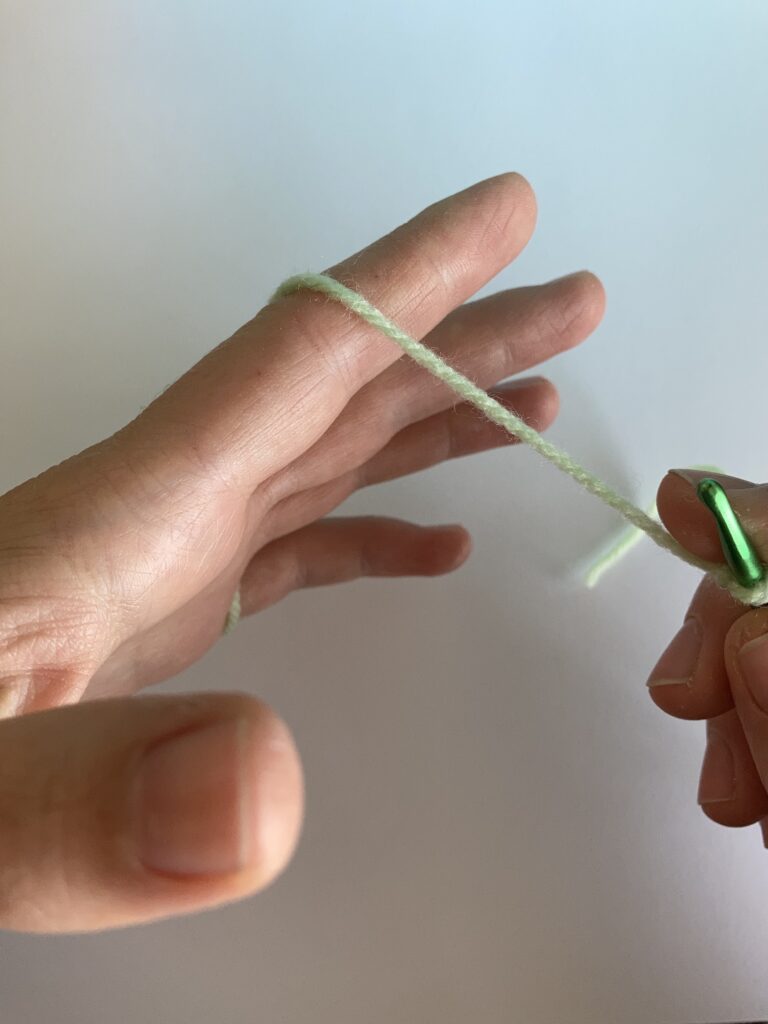
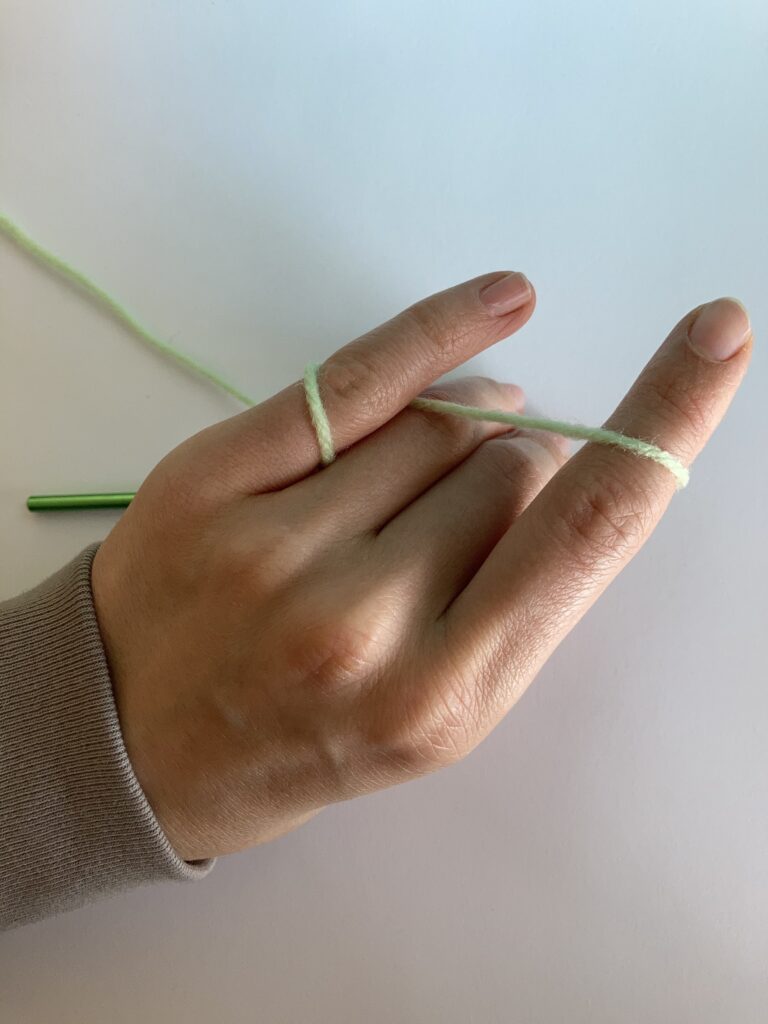
Now pinch the yarn close to the hook using your thumb and middle fingers. If the yarn is loose, pull the end below your little finger until the yarn is taught.

Holding the yarn this way is important. The left hand creates tension which is essential to being able to easily hook and twist the yarn with the hook.
Once you’ve mastered the slipknot and holding the yarn, you’re ready to make your first stitch! You are already well on your way to becoming proficient in crochet. It’s time to learn the chain stitch and single crochet!